Blimp!
flying balloon!
This semester I participated in a BLIMP Prototyping Workshop and I wanted to document my process with building and constructing a blimp!
Blimps are balloons which can move. An example would be the sharks in the image below. The sharks are being propelled forward by a single servo motor which is their tail. We are not allowed to use any actual motors so servos are the only means of creating motion. We built these sharks from a kit on the first day to introduce us to the idea of a blimp, and then were asked to build our own from scratch.
The design process.
Idea
Since the blimps had to be biologically themed, we had several different ideas including dolphin, stingray, jellyfish, and ladybug. We settled on the butterfly idea partially because butterflies are pretty, partially because that’s what the wheel landed on, and partially because everyone was doing ocean-themed animals and we wanted to do something different.
Wiring
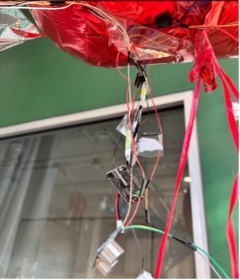
We spent two entire sessions stripping/connecting wires and trying to ensure they were long enough. This took a weirdly long amount of time to do because we kept accidentally switching male-female or made it too short or overcorrected and made it too long. They would constantly get tangled when we put them in the box, so I took some old rakhis that I had at home and tied the wires up so that we could actually separate them properly.
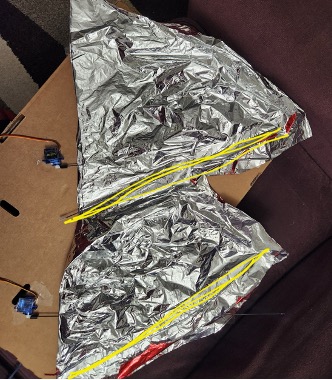
Wings
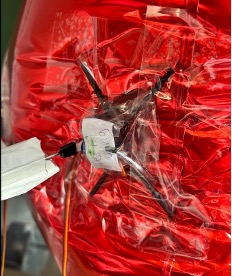
We originally wanted to use the long gray balloons as they held more weight (160 grams) and cut out butterfly wings, proportionate to the size of the balloon. It wasn’t until we attached the carbon fiber rods to the wings that we realized that there was no way the servo motor would be able to lift the weight of the air pocket created by the wing. That’s when we decided to run some trial and error at home.
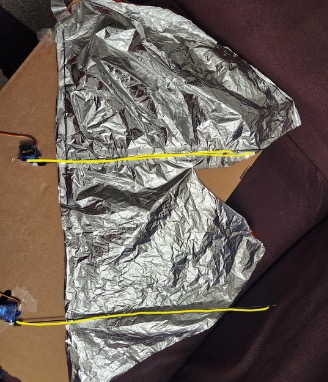
We created triangular wings to prevent large air pockets and allow for better airflow. With our test wings, we originally had the rods aligned along the slant of the wing, thinking it would work the same and potentially be more aerodynamic due to the wing shape. However, it just made it more difficult to control due to the weird angle. After shifting the rods to a perpendicular position, we were able to have some more stable flaps. Took a screenshot for the approximate wing sizes.
As I assembled this, here were the reflections that I had:
“Figured out how to attach the servos to the balloon, but it was difficult to test because the servos were too heavy for the tiny balloon and I was unable to assess how the balloon would actually move in any given context. So, weight really matters and it’s something we have to be mindful of when building. I do like the newer wing shape and want to try out the effect of airflow in various wing types but prolly don’t have time for that.
Symmetry matters a lot for the wings. Both the servos have to be attached at the same spacing and the wing shape must be exactly the same and rods have to be exactly parallel otherwise the airflow gets messed up and it drifts to one side. Since our servos are attached at the front and middle, the front of the blimp will be heavier, so our batteries/remaining electronics have to be on the back.
Depending on both weight and time, I think it would be pretty easy to add in CV stuff with a camera module or a distance sensor at the very least.”
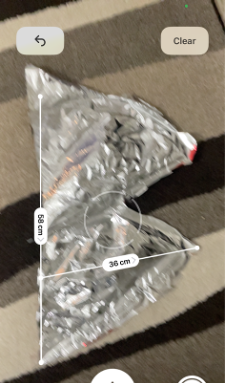
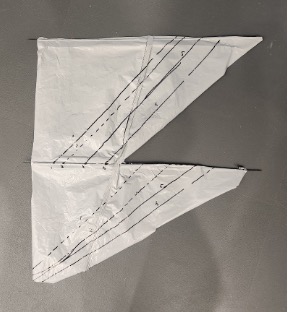
So we recut our wings into a more optimal, symmetric, right triangle shape. The image below shows the final wing design. The other lines depict possible sizes we were considering if we were to cut it down. It’s a good thing we didn’t make it any smaller, I don’t think we would have nearly as much momentum had it been smaller.
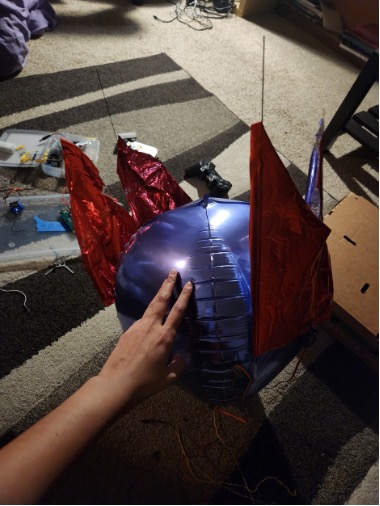
Attaching the wing + Testing movement
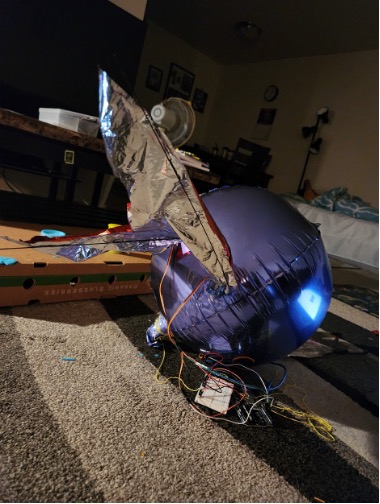
We ended up using a spherical balloon instead of the oval ones to match the prototype that I had built earlier. We were given mounts to attach the servos to the balloons and below is a depiction of the blimp after assembly. Weight distribution matters When we taped the ESP instead of letting it just hang, the center of gravity was higher and allowed for a more stable flight. Our battery was at the back of the blimp.
The code
The code for this use case was very simple. The only elements I had to figure out was the fact that a for-loop was needed to have the wings be as “synchronized” as possible. Otherwise, each servo moves up and down independently, not concurrently. I also had code for distance sensing, as well, but it was unused because the ultrasonic sensor was too heavy for our drone. The code using the Ps3 Controller looked similar to the following, except taking in inputs of the joystick.
Here’s a small snippet of the code:
void turnRight(){
   for (int angle = MIN_ANGLE; angle <= MAX_ANGLE; angle++) {
   myservo1.write(angle);
   myservo3.write(angle);
   delay(SPEED);
 }
 delay(10);
 for (int angle = MAX_ANGLE; angle >= MIN_ANGLE; angle--) {
   myservo1.write(angle);
   myservo3.write(angle);
   delay(SPEED);
 }
 delay(10);
}

void loop(){
 float distance = getDistance();
 Serial.print(distance);
 while (distance > 0 && distance <= 1.0) {
   turnRight();
   distance = getDistance();
 }
 forward();
}
